LAB I: Serial Output from P5.JS
First stop on the Serial Output Train – getting an LED to change in response to the functions in p5.js. In these three videos, you can see the different faces of interactivity in this system:
This is a modal window.
This is a modal window.
This is a modal window.
PROGRAM THE MICRO-CONTROLLER AGAIN
I was able to get the H and L in the serial monitor to turn the LED on and off – however, not every time.
QUESTION: How come this does not work every time the H or L is pressed?
PROGRAM p5.js to CONTROL THE LED
I programmed as planned and everything was perfect. The LED turns on with H and off with L. And then I ran into this paragraph in the lab:
Notice how the values returned to P5.js are 72 and 76, the ASCII values for H and L. For single characters like this, exchanging data is simple.
Nothing happened with numbers or with the LEDs lighting or mouse being pressed. Why? I thought may be because when we had to upload the “PhysicalPixel” example in arduino, the code for the mouseDragged attached to mouseY was not present. So I added that back in to the code, as I thought I was missing code.
I did resend and restart the serial communication. The LED stopped responding every time the “H” was hit and remained at zero. But when H did facilitate a light up, the number 72 appeared. And other times, other numbers appeared. I think this is because the mouseDragged code was active.
Take 3: I removed the mouseDragged code from the P5 sketch. After this, it took several taps of “H” to get it to turn on and 76 sometimes appeared in the canvas.
Take 4: Someone* did not remove a rogue line of code from the previous incarnation of the sketch. Once removed, the H and L appeared in accordance with the LED on going on and off and with the numbers 72 & 76. (*someone = me).
PROCESSING ASCII CODED STRINGS WITH ARDUINO
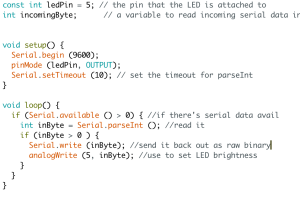
I went ahead and changed the code to the code that was presented in this part of the lab. However, it did not work per the instructions of the lab. This happens quite often. My question here is:
Are we adding to the code we already have, or are we starting new code? What is the best way to infer this?
I added this new code to the previous code and still, nothing happens when I type 65 in the out box in the serial monitor.
I then copy and pasted the code from the lab to see if that would work exactly as it was. And it did. a 65 brought up an A in the serial monitor. So then I went back to my code, cleaned it up and it eventually worked.
PROGRAM P5.JS TO SEND A STRING
I am not sure what this is asking to do.
I am not sure what this is trying to convey. What is int ()? Is that referring to const int? What is round()? What is this particular section covering that wasn’t covered in the preceding paragraphs? What should be added at the end of the Arduino code that has not been added yet? I am a slightly confused. Also I am wondering when/why we would need to use parse.
LAB II: Two Way (Duplex) Serial Communication
This lab is of high importance, as it will help pull together how we are crafting the midterm. So, full speed ahead!
The coding through the arduino worked nicely, three sensors with three outputs and separated by a comma.
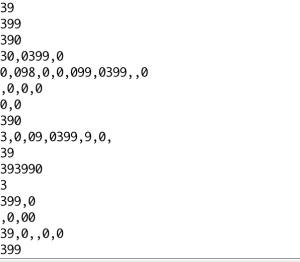
However, when I did the p5 code, I kept getting the error message. (I really thought it would work the first time through this time. I should have expected this.) I then resorted to copy and pasting the code into a new p5 project, remapped the sensors, and I did get the ball to move around.
What was wrong with the initial code?
I found one typo. Fixed it. Unplugged, replugged and reestablished serial communication. No matter how many times I went through the code, I kept getting an error. So I deleted it all and started over.
And finally it worked. However, the circle would not work each time and it would shake a bunch. I did play with the color a bit and was able to change the color of the circle.
QUESTION : Why didn’t I have to map in the arduino sketch to 0, 255?
FLOW CONTROL – HANDSHAKE
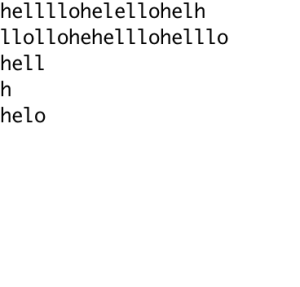
I added the code per instructions of the lab and did not remove anything, as the lab said not to. And I did not get a string of 3 numbers after the “hello”. In fact, Hello printed out funny. I was getting this:
I unplugged then replugged in the arduino and it worked fine.
QUESTION: If the connections are so iffy and the device keeps needing to get reset like this, what is the benefit of using this? Aren’t we supposed to be creating projects that work consistently? Is this what the handshake is for?


Tom Igoe
Several answers:
Many of your problems, particularly the last, look as if you left the serial monitor open in Arduino while running your sketch in P5.js. This would cause inconsistencies in the sketch getting the data, because only one program can control the port at a time. Your process for changing Arduino sketches should always be:
1) make sure serial server in P5 is stopped.
2) upload Arduino sketch
3) open serial monitor in Arduino, perform any needed checks to see that Arduino is responding as expected
4) close serial monitor
5) start serial server in P5
6) start P5 sketch
——-
What is int ()? Is that referring to const int? What is round()
Any time you see a function name in the text (the () indicate a function name), you can look it up in the reference guide. If the text is talking about P5.js code, you can look it up at http://p5js.org/reference/. For Arduino code, you can look it up at https://www.arduino.cc/en/Reference/HomePage
————
Are we adding to the code we already have, or are we starting new code? What is the best way to infer this?
Generally, assume you are adding to the existing code, unless the lab says something like “start a new sketch”.
——————-
What is this particular section covering that wasn’t covered in the preceding paragraphs?
It’s showing you how to program P5.js to send an ASCII-encoded numeric string instead of a single byte.
What should be added at the end of the Arduino code that has not been added yet?
Nothing yet, since the code it’s referring to is P5.js code. You already made the necessary change in the Arduino code by changing from read() (which reads and evaluates the single byte) to parseInt() (which reads and evaluates the ASCII-encoded numeric string).